[button-green url=”https://bloggerprasad.com/go-WPForms” target=”_self” position=”center”]CHECK WPFORMS[/button-green]
File Upload Form in WordPress: How will you allow users to upload file attachments to your WordPress blog using WordPress forms? You can give them the option to add any number of files ranging from media, documents to attach in the form and help them by simplifying the process of collecting information from your users.
In this post, we’ll talk about something crucial for your reading. A step-by-step process that will make the process of “File upload form in WordPress”. If you don’t want reading the entire article. Here is a quick snap of the File Upload Plugin From WPForms.
Next, in the following list, you’ll see things that you need to understand and for easy navigation.
- How to Create a file upload form in WordPress?
- Using the classic field style file upload field
- Customizing file upload form settings
- Configuring the file upload form notifications
- Configuring the file upload form confirmations
- Adding the file upload option to your website
- View files
[su_heading size=”17″ margin=”50″]How to Use a File Upload Field Using WPForms on WordPress Forms?[/su_heading]
Collecting information from the users using forms was never been so easier. And that just because of the file upload field so that you can obtain information from your users without any hindrances. Further, it helps fill up forms on your WordPress site and reduce the number of form abandonment rate and you earn more revenue.
You may need to use a file upload field on the WordPress forms to collect relevant information on different media and file types.
Let’s look at different scenarios in which users upload a file on your WordPress site using the contact form.
- Job application – Allow users to attach resume files
- Giveaway Plugin – Allowing visitors to upload photos and image files for contests
- User Submitted content form – Allow user for guest post and images
- Client services forms – Client attaches worksheet to specify a particular document.
- Customer support forms – Customers upload files and attach documents for offered product & services
- Podcast – Audio clip attachments are sent
- Event registration forms – People submit videos and or things that you want to play during an event, anniversaries etc.
And, there is no end to how file upload is an essential matter to your business.
Since WPForms plugin needs no introduction. The plugin allows the visitors of the site to upload all sorts of files through contact forms such as documents, images, videos and audios.
But at some extent file upload functionalities may not be able due to WordPress security reasons.
Let’s read further on How to add the file upload field to your WordPress contact form.
Creating the first file upload form in WordPress?
In this section, the entire proccess is carved to offer you a pleasent experience in Installation >> Activation >> Working of the Plugin. At any point of time if you issues arrive then please consider re-reading the entire proccess to make it work. You can also tell us about the particular issues you are facing while installing.
[alert-warning]Read My Other Article On – SmartLook Review (Website Visitors Screen Recording Tool)[/alert-warning]
[su_heading size=”17″ margin=”50″]Step 1 : How to Create a File Upload Form in WordPress?[/su_heading]
First & foremost download the WPForms Plugin from the WordPress repository and Install > activate the plugin. WPForms plugin help add a file to file uploads almost anywhere on the site, unlike google form upload which has limited options.
Concerning details of installing the plugin and configuring it correctly. You need to follow the process of the steps below.
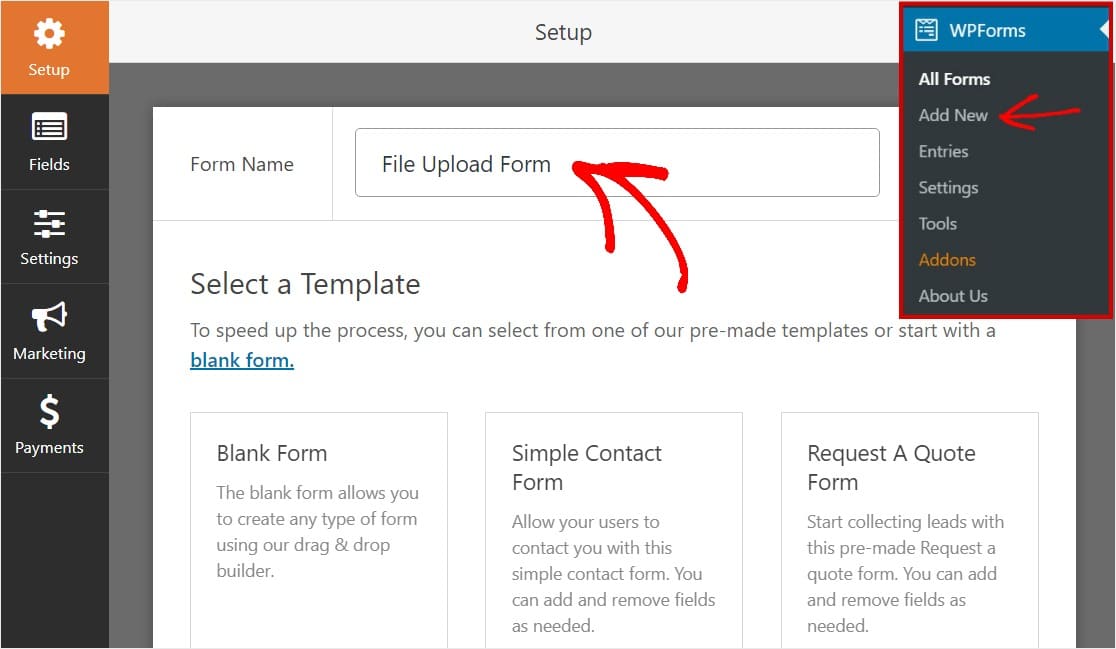
Configuring the plugin to make it work easily through the WordPress dashboard. Click on WPForms >> Add new at the left side of the panel. Create a new form provide the desired name to it.
Next, find the “Additional Templates” section and Type “Upload Form” and select the appropriate template.
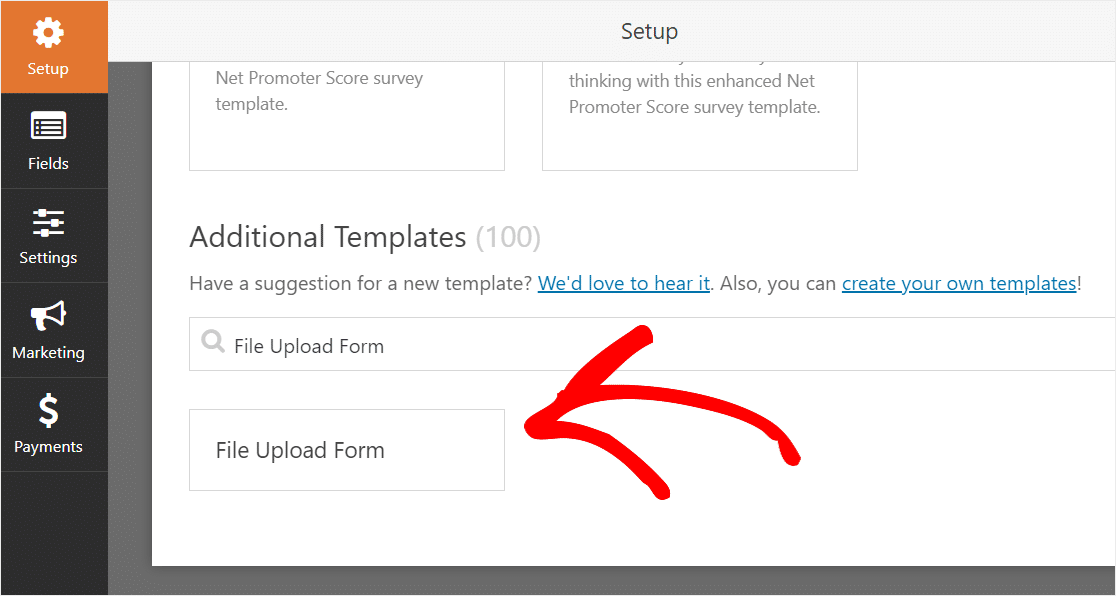
Not to forget you need to activate the form template pack addon. WPForms will now load a pre-defined file upload form and allow editing using drag-&-drop builder.
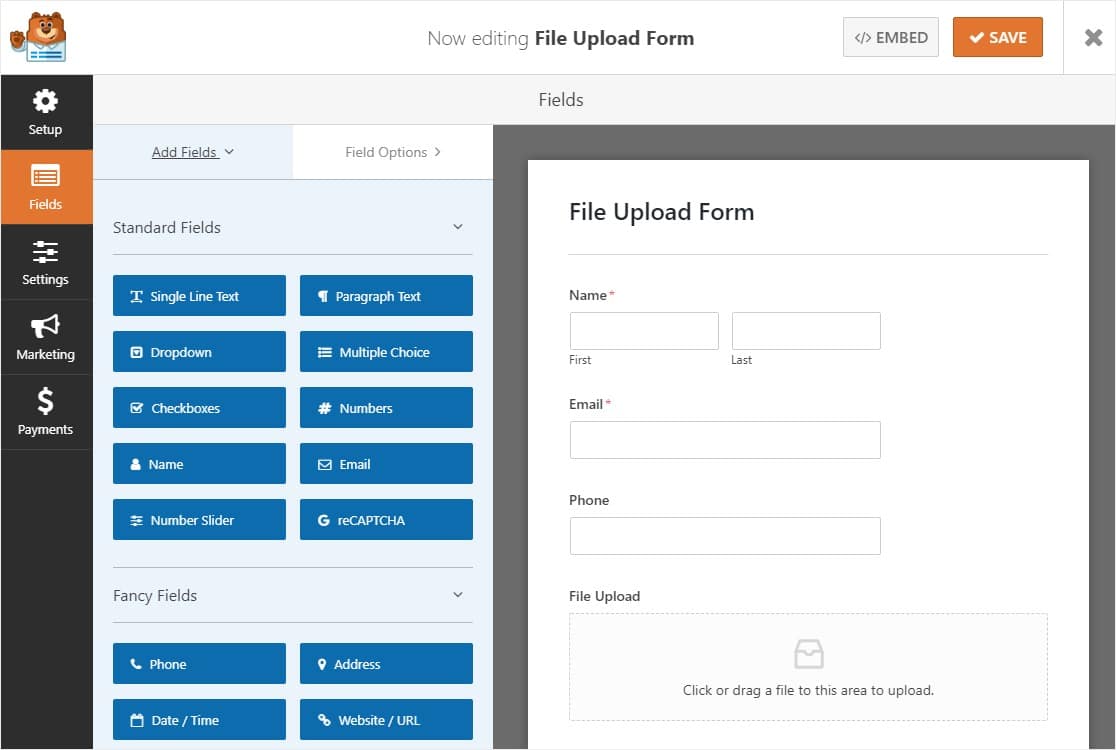
Now, you have additional fields to your contact form to add. Use contact form by dragging from the left-hand panel to right-hand panel.
WPForms allows you a file upload form template where the following fields such as Name, Email, Phone, File Upload and Additional comment fields are given.
You can edit & customize any field of your choice by using the simple drag-&-drop builder to rearrange the order through the contact form.
Consecutively you can add the file upload field to any WordPress form. You need to drag the file upload field to the desired location usually found in “Fancy Fields” left-hand side of the panel in the form editor.
You can find a host of functions related to file upload field and to alter any changes.
- Label – Form field name to inform visitors about the use of form
- Description – Set a custom description explaining every bit of details to users
- Allowed File Extensions – Allow only a specific type of files for upload through WordPress form and restrict using commas
- Max File Size – Specify the file size in megabytes or leave it a blank to set the default file size of 128MB
- Required – Allow users to upload a file before they submit the form
- Style – Find different styling from modern to classic and use them as a default form type.
If you can’t figure out where these uploads will get stored?
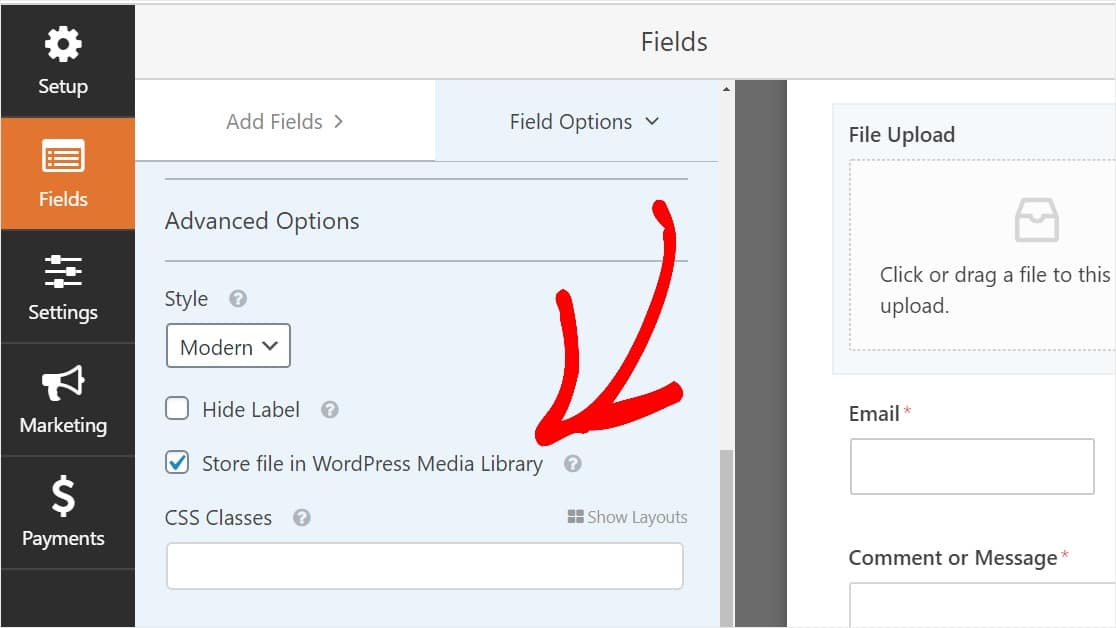
Then, by default all files uploaded will be stored under WPForms folder hence, you can find everything under the Uploads directory section of your site. On the contrary, you can even save these files inside the WordPress Media Library by choosing the option “Store Field in WordPress Media Library” under Advanced option.

[alert-success]Read My Exclusive Review On Best AdSense WordPress Theme For High Income in 2020[/alert-success]
[su_heading size=”17″ margin=”50″]Step 2 : How to Switch to Classic File Upload Field[/su_heading]
Well, you may not need this as an option now but some of you make like different style of the file upload field from default modern to classic style having a “Choose Now” button. Make sure to choose Advanced option >> Style and pick “Classic” from the drop dropdown.
You can switch between the respective style at any time. But we recommend using the classic style as because:
- You or users find the “button” style file from the upload field
- You prefer a more compact file upload field thus accepting only one file.
Note: A classic file upload style includes one file upload at a time. Although you can use another file upload field that accepts multiple uploads through the form when using the classic style.
Although a form field should look clutter-free and you may want to activate conditional logic on the first classic file upload field before you make use of them. The extra file upload fields will never be shown unless the users want to them.
Although Classic Style of the File upload field allows users with one single file. You can get more insights on adding multiple file uploads functions in classic style uploader. If you’re comfortable with one single file upload field you can jump to our next segment.
Conditional logic is important on classic style upload fields. You can drag a dropdown field using the left-hand side of the panel using the form from the above file upload field.

You can click on the drop-down field to see field option on the left-hand side of the panel and choose a different number of files for upload and choose any one among of 1,2 and 3.

Next on the screen select the File Uploads available in the option. Scroll down to see the different conditional tab in the left-hand side of the panel to select “Enable conditional logic”.

Customize every conditional logic for the File Upload using the following screenshot below.

You can be sure about new techniques of adding new group button for the OR logic. You can read more details using OR logic in our next topic.
Once the creation of form is finished click on the duplicate icon available on the right-hand side of the file upload field.

On the left-hand side of the panel, you can alter new labels of the new form fields using the upload your second file.

You can configure conditional logic for the new field using the screenshot below. The only things required is removing the first action where it contemplates “Number of files to file is 1”.

You can easily duplicate the second file upload field by clicking the icon and changing the label to “Upload your Third File”
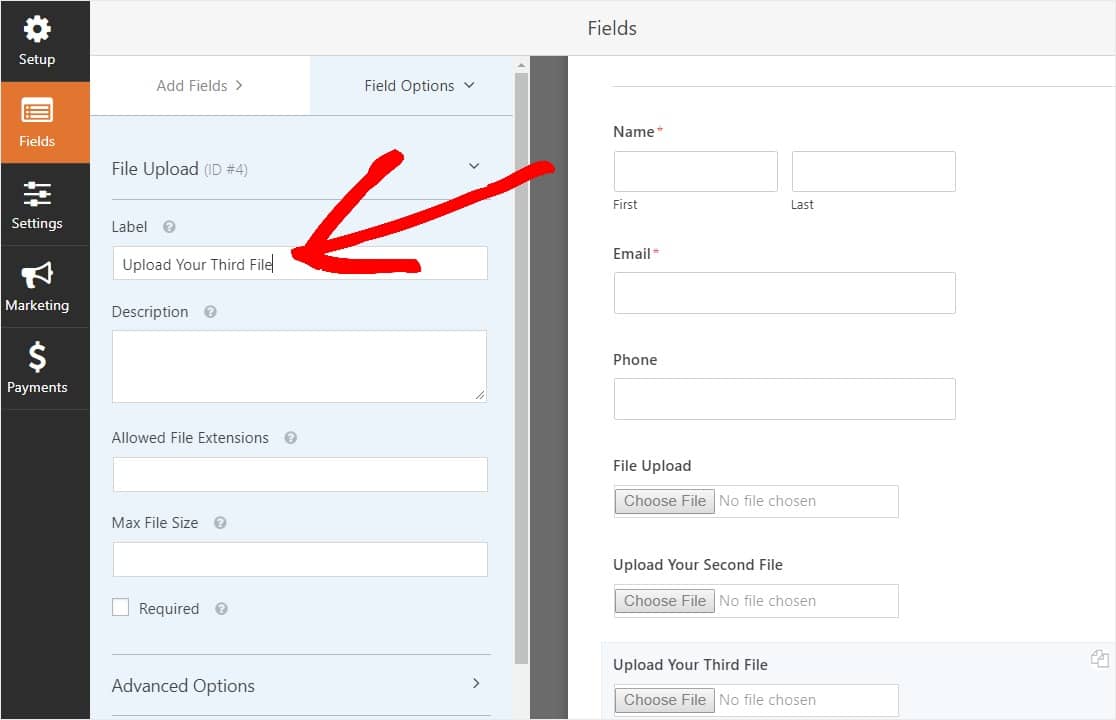
Setting up the conditional logic field are shown by mean of the screenshot below. The last form field is there to say the number of files is 3.

After all the customizing the form requires saving. You can reach the top right corner of the screen and add multiple file upload fields to your form.

In most case, we see a modern style that works with multiple file uploads. You must have acquired good knowledge using the file upload fields to the form. Next, we’ve changes to be made to file upload form settings.
[alert-announce]Read My Other Article On WP ShortCode Pro Plugin Review 2020[/alert-announce]
[su_heading size=”17″ margin=”50″]Step 3 : Configuring The Field Upload Form Settings[/su_heading]
In short go to the Settings > General
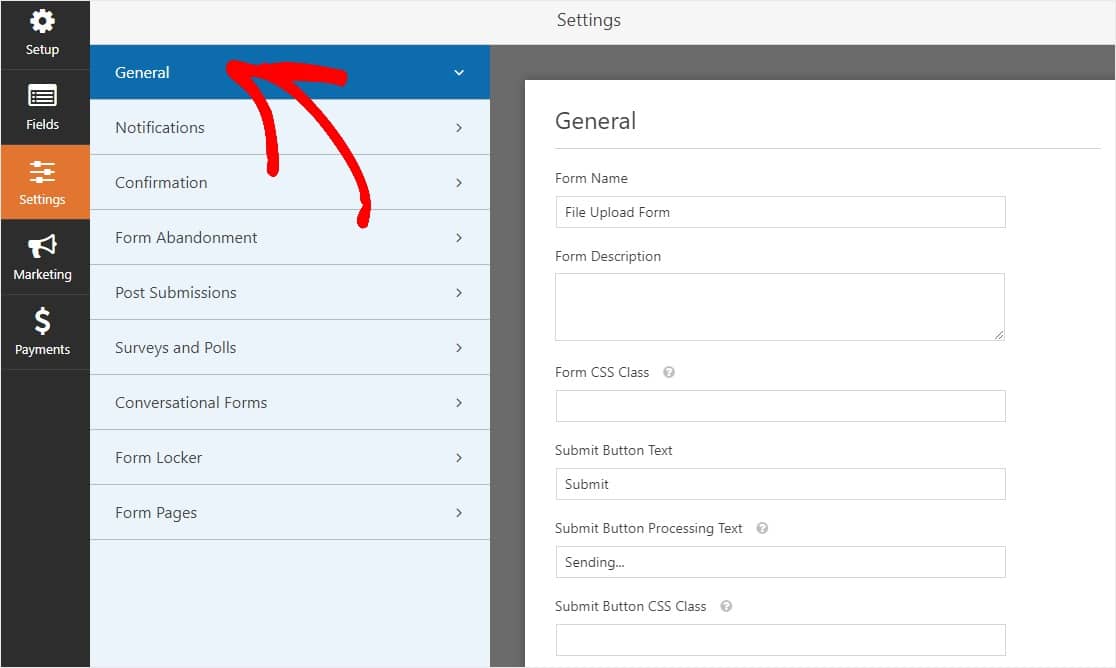
The following information on the page helps to configure file upload form settings correctly.
- Form name
- For description
- Submit button text
- Spam prevention
- GDPR enhancements
And when finished editing the fields don’t forget to save the settings.
[su_heading size=”17″ margin=”50″]Step 4 : How to Configure The Form Notifications[/su_heading]
Notifications are a great way to know who has submitted a form through upload forms.
Only if notifications features are disabled you’ll get an email notification whenever a person submits a form on the site.
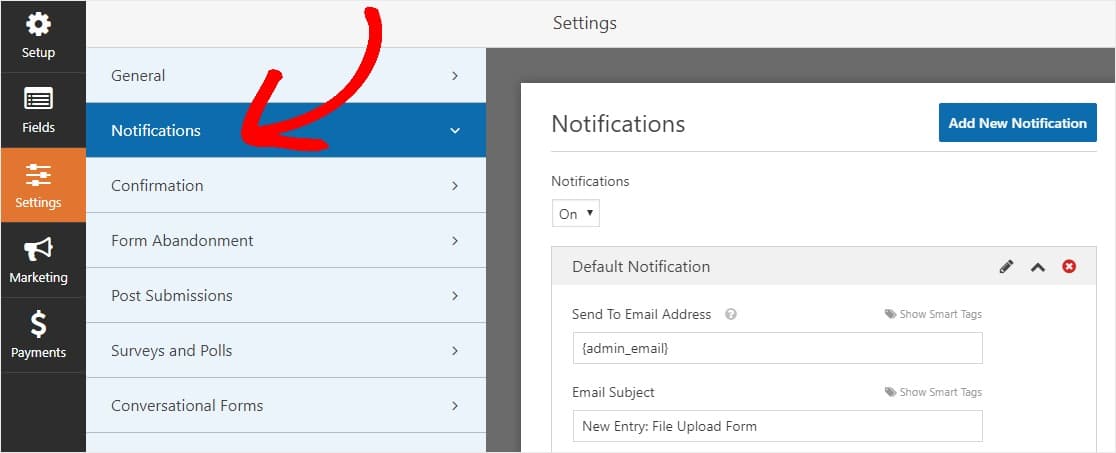
To obtain email messages from users who completes the form you may need to set up notifications in WordPress and provide the email address.
Using smart tags allows personalized notification to site visitors and allow them to finish the form until you receive on your end. Also, ensure if they’ve gone through proper file upload feature.

Additionally, you have the option of naming outbound emails by adding a logo or images in the custom header image area. The logo, images will be shown at the top of the email notifications like one below.

Note: In case of WPForms file attachments sent can hurt the email deliverability where WPForms do not need to attach users’ files & notifications emails. Besides WPForms file uploads using email & links.

[su_heading size=”17″ margin=”50″]Step 5 : Setting Your File Upload Form’s Confirmations[/su_heading]
If you are not aware of how to form confirmations work they notify users immediately after users have submitted information to your new form. In reality, there are 3 different kinds of confirmation in WPForms.
- Messages
- Display page
- Redirect
Customizing each part of the confirmations in WPForms will provide a success note after they have submitted a form on your WordPress site.
Regarding setting up a simple form confirmation in WPForms and customize success message to site visitors allows submitting a form on your site.
You can start by clicking on the confirmation tab in the Form Editor under settings and choosing the desired confirmation type. Choose Messages.
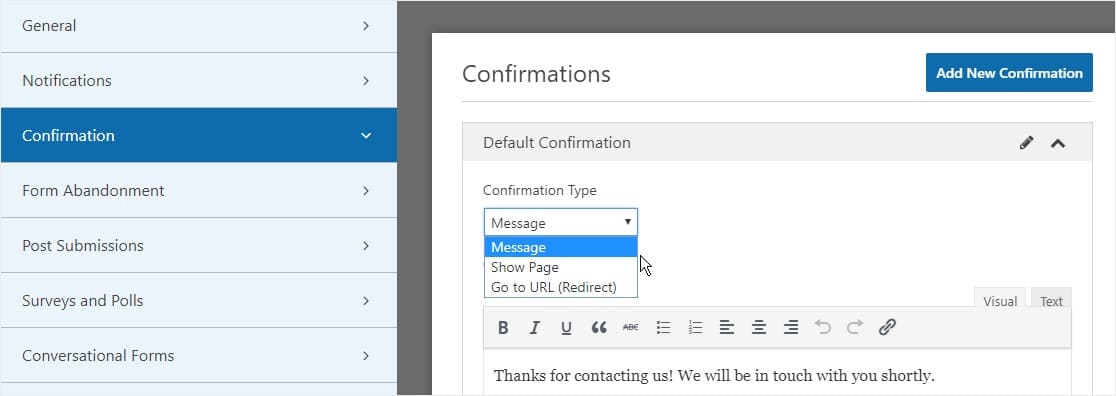
Customize the confirmation message according to you and click save when done.
[alert-note]Read My Other Article On – WP Subscribe Pro Plugin Review From MyThemeShop[/alert-note]
[su_heading size=”17″ margin=”50″]Step 6 : Adding the File Upload Form To Your WordPress Site[/su_heading]
When you’ve finalized the form, you can simply put it back to your WordPress website.
WPForms allow you add the form to multiple places on the site such as pages, blog post and sidebar.
It is a simple embedding technique and to learn to add the file upload form to your WordPress site. Create a new page or post and embed the settings on an existing one. If you’re not using the classic editor you may need to change few blocks -first block and next adding the add WPForms icon.
![]()
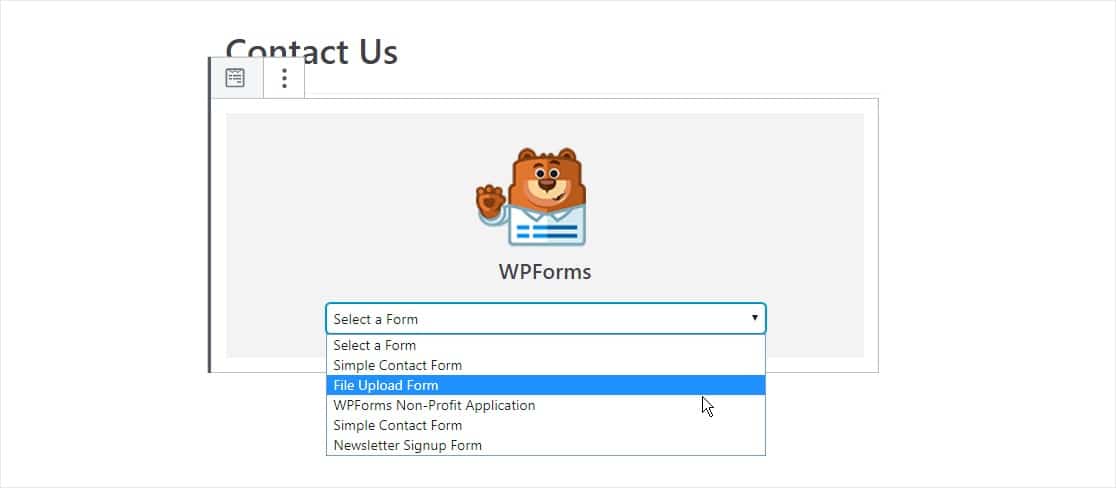
Existing WPForms widgets will show up inside the block. You can use the WPForms dropdown and choose that you’ve created and inserted into any pages of your choice.
Choose the file upload form
You can make the form appear on the pages, post or website by clicking on the blue button located on the top right side of the panel. Publish or update to get it going.
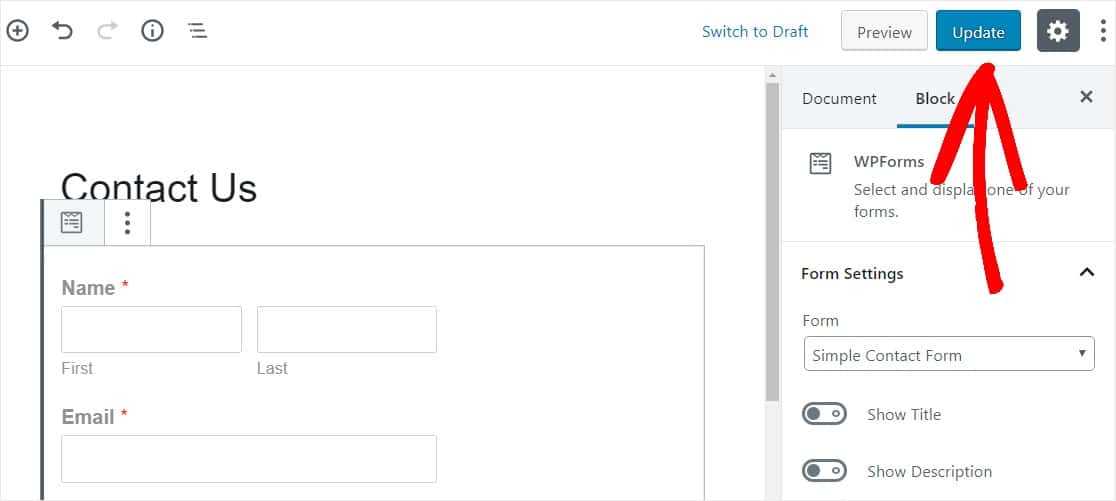
You’ve now successfully implanted the file upload form feature on your website.
[su_heading size=”17″ margin=”50″]Step 7 : How to View the Files of WPForms?[/su_heading]
WPForms accurately stores every sort of submission as an entry. To view uploaded files, check WPForms>>entries
You can add any number of forms and choose the right form from then cascading menu to view a specific entry.
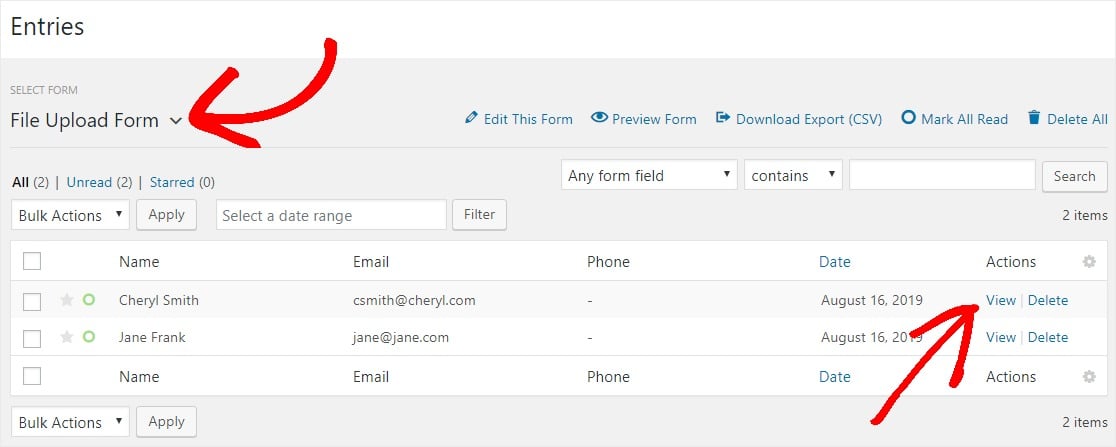
Next, you can do to ensure form appears in the browser. Click on the file to download and check the view.

Instead, use another addon “Zapier” to save every all upload to google drive, drive box and other cloud storage.
[su_heading size=”17″ margin=”50″]Our Final Words[/su_heading]
WPForms Plugin gifts remarkable benefits over other file upload plugin in WordPress. Also, if you allow users to upload files via your website you can check to follow as many guides from WPForms.
You can start early and get started to use the simplest WordPress form builder plugin today!
WPForms includes many more features that come with a straight 14-day money-back guarantee trial. You can reach out to me if you need any help while setting up “File Upload” Function using WPForms plugin.